Source
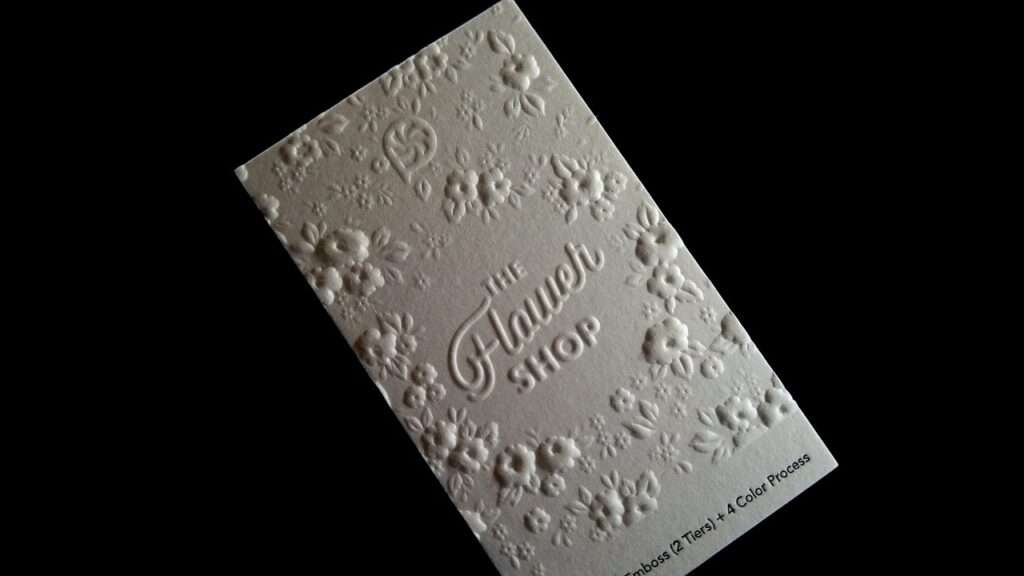
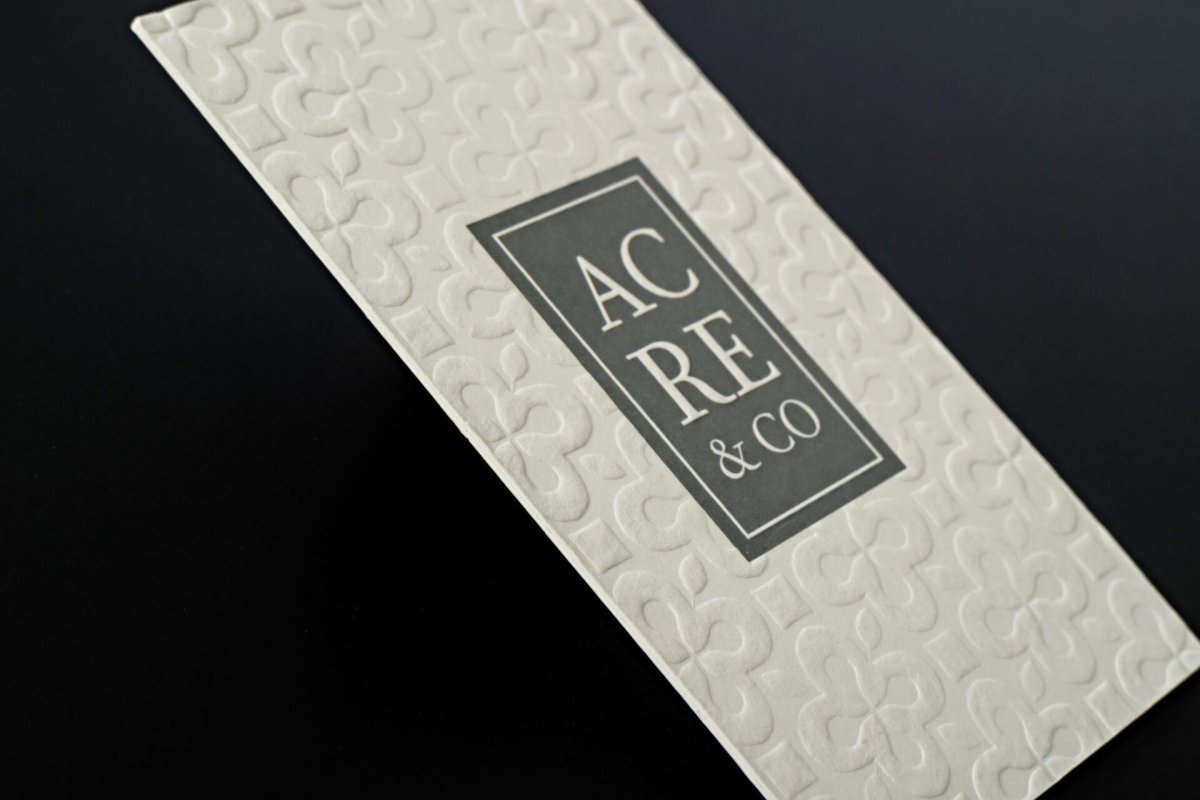
Embossing can add an aesthetic charm to your papercrafts, professional business cards, and scrapbook pages. There’s no one way of embossing your designs. You can use digital technologies or tinker around with everyday items — the options are endless.
Before we dig into what
embossing entails, let’s understand what
embossing is and explore some embossing-specific jargon.
What is Embossing?
Embossing is the art of popping up patterns and images on paper to yield a three-dimensional end product.
Stencil and stylus are one of the most common
embossing methods used by designers today. We’ll explore both in-depth later.
Embossing Lingo
Embossing isn’t rocket science, but there are some terminologies you should get friendly with. These include:
Chipboard: For
embossing patterns, we need light cardboard called chipboard. Chipboard has the same width and thickness as regular cardboard used in cereal boxes, making it a great choice for adding depth and texture to your designs.
- Dry Embossing: Dry embossing is also known as relief embossing. In this, we trace a stylus with a stylus to create a raised pattern.
-
Embossing Ink: This is a kind of thick and slow drying ink we use in a technique called heat embossing.
-
Embossing powder: Another material used in heat embossing. Embossing powder is spread out on a stamped image and melted with a heat gun to form a raised pattern.
- Heat embossing: In heat embossing, designers use embossing powder and ink, a stamp, and a heating mechanism to create a raised image or pattern.
- Heat Gun: heat gun is used to melt the embossing powder. It works best for localized treatments during heat embossing.
- Sandwich: Designers use crafting sandwiches in die-cutting. The anatomy of a sandwich consists of paper, die, base, plate, shim, all of which contribute to a die-cut.
- LightBox: Lightboxes are used to trace an image. They throw light on the image that is transmitted to view stencil lines under a paper sheet. If you don’t have a lightbox, you can also use a bright window as an alternative.
- Stencil: We use die-cutting machines to cut designs into metal, plastic, or some other material, in dry embossing. The resulting templates are called stencils.
- Stylus: An instrument similar to a pen used in relief or dry embossing.
 Source
- Heat Embossing
- Heat embossing is one of the most preferred techniques for creating raised patterns. It produces vibrant, intense, and dominating patterns. That said, you’ll require some special items for heat embossing that are not that commonly used. These include:
- Embossing powder
-
Embossing ink – To maintain the embossing powder’s consistency, you need an embossing ink.
- A stamp and an acrylic block: the choice of design is up to you.
- Heat gun: Many people who don’t have a heat gun use blow dryers and create a ruinous mess. The best thing about heat guns is that they don’t blow out air. This way, your powder stays intact in one place.
Heat
embossing is super simple. Here’s what you have to do:
- Use the embossing ink to stamp your image.
- Spread some embossing powder on the stamped image.
- Get rid of the excess powder.
- Take your heat gun and melt the embossing powder.
Dry Embossing
You can do dry
embossing with a stencil and a stylus. This makes the technique perfect for a beginner embosser. If you don’t have a stencil, you can even use a safety pin for the same effect.
Dry
embossing is about experimentation and exploration. Give the technique a go in your next project and see whether you like it or not. If you do, go ahead and invest in tools and supplies for the long haul.
Follow these steps to dry emboss:
- Use scotch tape to fix your stencil to a lightbox. Stencils having deeper groves will be ideal. The side of the stencil you want to see on the finished design will be opposite to the one you see facing up on the instrument.
- Place a paper over the stencil and close the corners with tape. Because thin paper breaks away easily, cardstock and vellum are more dependable options. To help the stylus glide better, apply wax paper over your paper surface.
- Use the stylus to trace around the stencil. Press firmly, but don’t overdo it.
- Lift the paper off the stencil to reveal your marvelous creation.
As a general recommendation, use a 65 or 80lb. cardstock for dry
embossing.
 Source
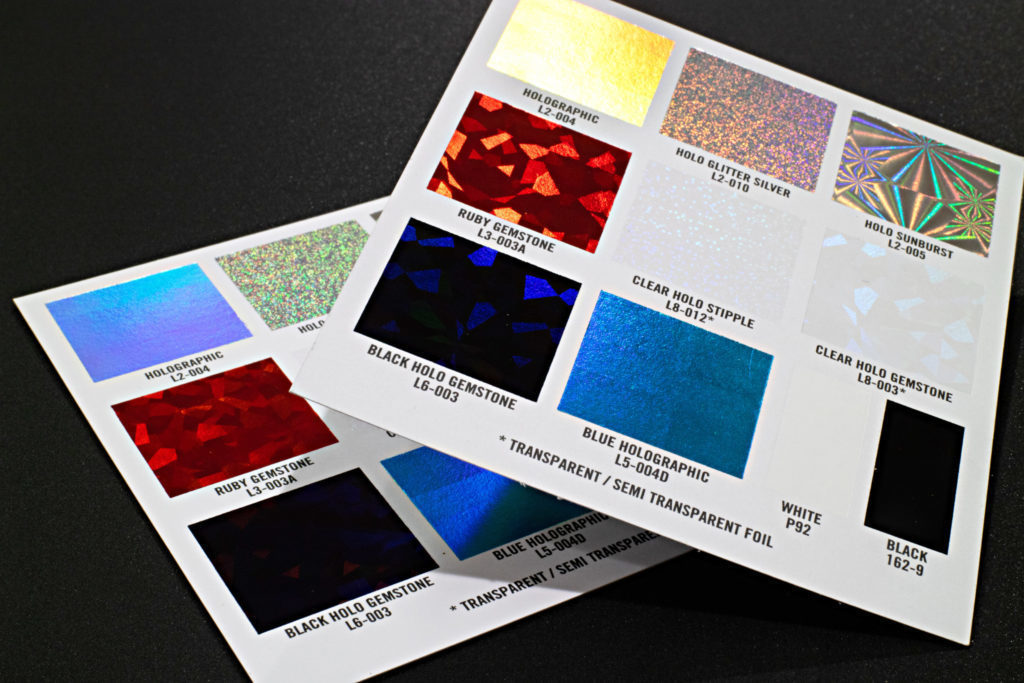
Foil Embossing
Source
Foil Embossing
Foil
embossing is self-explanatory. It creates an embossed
foil pattern. All you need to
foil emboss a luxe pattern is to use a die-cut to adhere an aluminum foil to a cardstock.
Foil
embossing requires a bit more manual labor, but the end product is worth the effort. Debbie Seyer has a
great tutorial for people wanting to enter the beautiful world of foil embossing.
Not into labor-intensive foil
embossing? Go for a metallic cardstock instead.
 Source
Using Die Cutting Plates
Source
Using Die Cutting Plates
This is where a crafting sandwich fits in. In die cutting plates, we use a sandwich to emboss designs.
First, we fill the cavities of the sandwich with an acrylic plate and cardstock and then pass it through a die-cutting machine to create a stunning embossed pattern. This tutorial by
Kerrie Gurney will get you started.
Foil
embossing dovetails goes hand in hand with both smooth and textured papers.
What About Debossing?
As the name suggests, debossing is the process of reverse
embossing. In this technique, we create an indented pattern instead of a raised one. Graphic and print designers usually employ debossing.
Want to deboss your paper crafts? Simply flip over your embossed designs and you’re good to go. Keep in mind that your stencil or die-cut has to be in the right direction for this to work.
Use this
cool inking technique to take your debossing to a whole new level.
 Source
Emboss your way to Success
Embossing
Source
Emboss your way to Success
Embossing adds a whole new dimension to your paper crafts and can make any design look net and professional. It’s a great way to impart thickness and a new dimension to a flat concept. All you need is a little bit of practice, and you can turn a pro embosser in no time!